Back to DIY Advice
DIY Floor Sanding vs. Professional Restoration: What You Need to Know
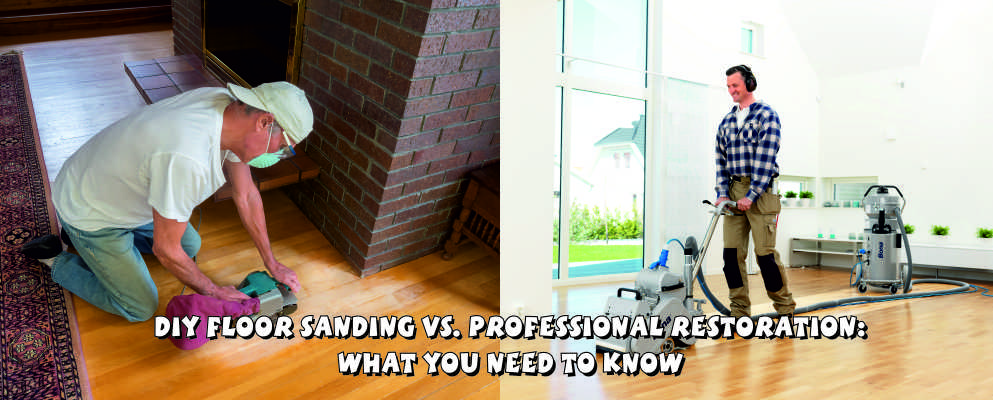 Many DIY enthusiasts take on floor sanding projects expecting a straightforward process, only to realise that it requires far more effort, skill, and precision than anticipated. The challenge isn’t just about using a sanding machine—it’s about properly preparing the floor, choosing the right grits, handling delicate areas, and ensuring an even finish. Mistakes such as uneven sanding, swirl marks, or over-sanding can lead to costly repairs without the right expertise. Additionally, the sheer physical effort involved, from lifting heavy equipment to meticulously working through multiple sanding stages, often proves overwhelming. This is why many DIY attempts result in frustration, subpar results, or even damage to the flooring, ultimately requiring professional intervention.
A Complete Guide to Full Floor Restoration
Many people try to sand their floor unsuccessfully, not purely because of a lack of proper training and expertise, but because of the fact they underestimate the amount of work involved. Let’s check what is in store:
Cleaning
Floor cleaning is an important step in the floor restoration process, both before and during the renovation. Before any sanding begins, the floor must be completely cleared of furniture, rugs, and debris to ensure an unobstructed work area. Dust, dirt, and residues can interfere with sanding, leading to an uneven finish or clogging the sanding equipment. Additionally, cleaning is required at multiple stages—after floor repairs, between sanding rounds, and before applying any stains or sealants. Skipping proper cleaning can result in trapped dust particles, affecting the final look and durability of the finish. A well-maintained workspace ensures a smoother sanding process and a professional-quality outcome.
Floor repairs
Before sanding can begin, essential floor repairs must be carried out to ensure a smooth and even surface. This includes replacing damaged or rotten boards, securing loose planks, and fixing uneven areas that could affect the sanding process. Any protruding nails, screws, or staples must be removed or hammered down to prevent damage to sanding equipment. If the floor is reclaimed or previously glued down, old adhesives and bitumen residues need to be scraped off to avoid clogging the sanding belts. Skipping these repairs can result in an uneven finish, excessive dust, and further deterioration of the floor over time. Proper preparation guarantees a stable and long-lasting restoration.
Floor sanding
Sanding is a multi-step process that gradually smooths the floor’s surface using different grit levels. Many DIYers assume that simply running a sander over the floor will create an even finish, but achieving professional results requires a systematic approach.
Key aspects of the sanding process include:
- Grit Progression – Sanding starts with a coarse grit (typically 24 or 36) to remove old finishes, deep scratches, and imperfections. Successive rounds use finer grits (60, 80, and up to 120) to refine the surface. Skipping grits can lead to visible scratches or an uneven finish.
- Equipment Handling – Professional sanders are powerful machines that require controlled movement. Holding the sander in one spot for too long can create dips, while improper handling can leave swirl marks or uneven patches.
- Flooring Type Considerations – Some floors, like engineered wood, have a thin wear layer that can only be sanded a limited number of times. Over-sanding can permanently damage the surface, making professional expertise essential in certain cases.

Each stage of floor sanding plays an important role in preparing the floor for staining and finishing. A rushed or poorly executed sanding job can result in visible flaws, reducing the overall quality of the restoration.
Gap filling
Gaps between floorboards are a common issue caused by natural expansion and contraction due to changes in temperature and humidity. Over time, these gaps can become more pronounced, leading to problems such as heat loss, increased draughts, and even structural instability in some cases.
- Energy Efficiency – Unfilled gaps allow cold air to enter and warm air to escape, increasing heating costs.
- Structural Integrity – Gaps can weaken the overall stability of the floor, especially in older properties.
- Aesthetic Improvement – Filling gaps creates a more uniform and polished look, enhancing the floor’s appearance.
There are different methods for gap filling, including using wood slivers, resin mixed with sawdust, or specialist fillers. Choosing the right technique depends on the size and type of gaps. Skipping this step can lead to long-term maintenance issues and reduce the effectiveness of the final finish.
Buffing
Floor buffing is the final step in the sanding process, where the floor is polished to remove any minor imperfections left from the previous sanding rounds. After multiple grits of sanding, small scratches, swirls, or uneven areas can still be present, which can affect the smoothness and shine of the finish. Buffing helps to refine the surface, ensuring it is as flawless as possible before moving on to staining or sealing.
- Smoothing Minor Imperfections – Buffing removes any lingering imperfections from sanding, leaving the floor with a uniform texture.
- Preparing for Finishing – A smooth surface ensures that stains, oils, or finishes adhere evenly, improving the final look and durability of the floor.
- Enhancing the Shine – Buffing also helps to enhance the natural shine of the wood, providing a polished and professional appearance.
This step requires a buffer machine and the right pads to ensure the floor is treated evenly. Skipping the buffing stage can result in a less polished finish and may compromise the overall quality of the restoration.
Staining
Staining is one of the most crucial and challenging stages of floor restoration, as it allows homeowners to change the floor’s colour and enhance the wood's natural beauty. However, achieving an even, high-quality result requires precision, expertise, and careful preparation.
- Colour Matching – Selecting the right stain to match your desired aesthetic or the room's design is a complex process. Different wood types absorb stains differently, and achieving a uniform colour requires knowledge of how the wood will react.
- Even Application – A streaky or uneven application can be noticeable, making it essential to apply the stain evenly and consistently.
- Proper Technique – Floor staining should be done with the right tools, such as brushes or cloths, and the stain must be applied in thin coats. Multiple layers may be required, with sufficient drying time in between, to achieve the best results.
This step also demands a good understanding of how different stains work with various wood types and finishes. An inexperienced application can result in blotches or uneven tones, affecting the overall appearance and value of the floor.
Sealing and finishing
Floor sealing and finishing are the final stages of floor restoration, where protective layers are applied to preserve the floor’s beauty and enhance its durability. This step is crucial for ensuring that the wood is shielded from damage caused by wear, moisture, and stains, prolonging the life of the floor.
- Protection – Seals and finishes create a protective barrier against scratches, spills, and foot traffic. A high-quality finish prevents moisture from penetrating the wood, which can cause warping or discoloration.
- Aesthetic Appeal – The right finish enhances the natural grain and colour of the wood, giving it a rich, polished look. Whether opting for a matte, satin, or high-gloss finish, the choice should align with the desired aesthetic of the space.
- Longevity – Applying multiple coats of finish ensures long-lasting protection. Some finishes, such as polyurethane or hardwax oil, are specifically designed for high-traffic areas, ensuring the floor remains intact for years.
Choosing the right finish depends on the type of wood, the level of traffic the floor will endure, and personal preference for shine. A poorly selected finish can result in a dull, uneven surface or inadequate protection. Proper sealing and finishing guarantee a durable, attractive floor that will stand the test of time.

If you're considering sanding your floor yourself, here are some important factors to keep in mind:
-
Staining and Gap Filling – Both staining and gap-filling are intricate tasks that require experience and precision. It's best to leave these steps to professional flooring experts who have the necessary skills and tools to achieve flawless results.
-
Research Floor Sealants – Always do thorough research on the floor sealants you intend to use. Retail store assistants, like those at B&Q or Wickes, may offer helpful advice, but they often stock general-purpose products. Specialised floor sealants, which are more suited for your needs, are typically available only to professionals.
-
Invest in Quality Equipment – To achieve the best results, you’ll need to hire proper wood floor sanding equipment, such as an 8" or 10" belt sander and an “edger.” Edging tools are crucial for handling hard-to-reach areas like corners, skirting boards, and stairs. Also, make sure you have a system in place to deal with dust.
-
Learn from Experience – It’s always helpful to consult with someone who has already sanded their floor. Ask them for advice and, if possible, get hands-on experience using mock flooring or samples. Don’t rush straight into your floor—take the time to get comfortable with the equipment and the process. Trying to learn on your floor could lead to costly mistakes.
-
Inspect and Repair Floorboards – Before you begin sanding, thoroughly check all floorboards for any loose or damaged planks. Replace or repair any weakened boards during this stage, as it will be much easier to do so before the sanding begins.