Back to DIY Advice
Why a LVT Flooring is Opening Gaps or Cracks on Top of the Click After Installation
Installing luxury vinyl tile (LVT) flooring can transform any space with its durability, ease of maintenance, and elegant design. However, one common issue many homeowners and professionals face is the appearance of gaps or cracks along the click-lock joints shortly after installation. In this post, we explore why this happens and how proper subfloor preparation can be the key to a flawless finish.
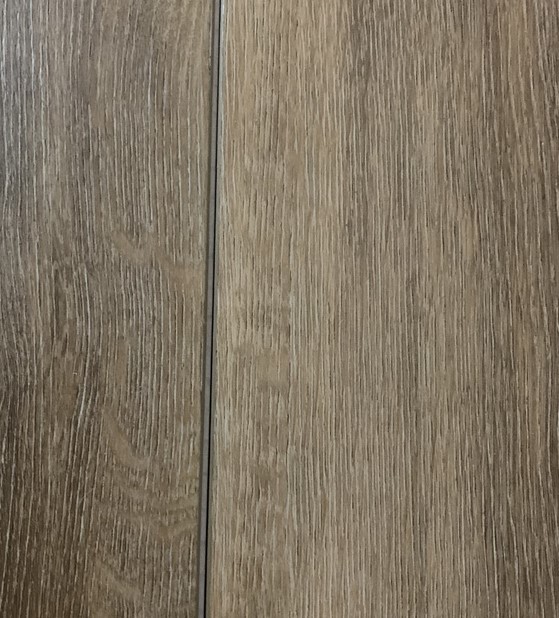
The Common Issue: Gaps and Cracks
A frequently asked question in the world of LVT flooring is: "Why does my LVT flooring develop gaps or cracks at the click joints after installation?" While there can be various contributing factors, the answer often comes down to one critical element—the levelness of the subfloor.
The Role of the Subfloor
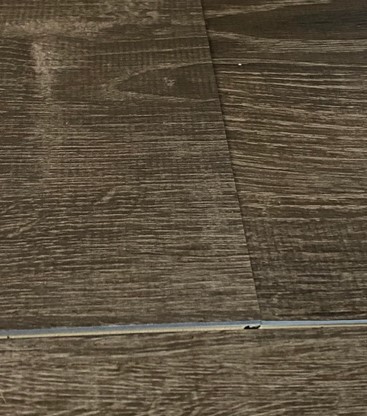
The subfloor serves as the essential foundation for your LVT flooring, playing a critical role in ensuring a durable and long-lasting installation. If the subfloor isn’t perfectly level, it creates uneven pressure points on the click-lock mechanism, which is designed to interlock seamlessly for a stable surface. Over time, these pressure points can cause the joints to shift, weaken, or even break, eventually leading to unsightly gaps, lifting, or even cracking of the planks.
This is not just a cosmetic issue—it can compromise the structural integrity of your flooring, reducing its lifespan and causing unnecessary repairs or replacements. Additionally, an uneven subfloor can lead to squeaking sounds, poor underfoot feel, and difficulty in maintaining a flush, smooth appearance. To prevent these problems, it’s essential to properly prepare and level the subfloor before installation, ensuring a stable and secure foundation for your LVT flooring.

Why Leveling is Important
A level subfloor ensures that the entire surface is evenly supported, minimising stress on the interlocking joints of your LVT flooring. Here’s why proper subfloor leveling is essential:
- Uniform Pressure Distribution – A flat, level subfloor evenly distributes the weight of the flooring, preventing excess pressure on specific areas that could lead to premature wear.
- Enhanced Durability – Reducing stress on the click-lock system helps extend the lifespan of your flooring, ensuring it remains stable and long-lasting.
- Improved Aesthetics – A smooth, even surface allows the flooring to lay perfectly, creating a seamless and professional finish without visible gaps or irregularities.
- Prevention of Noise Issues – An uneven subfloor can cause creaks and squeaks when walked on, making proper leveling crucial for a quiet and solid installation.
- Better Adhesion for Glue-Down Installations – If using an adhesive, a level subfloor ensures proper bonding, preventing lifting or shifting over time.
Effective Methods to Level Your Subfloor
To prevent gaps, cracks, and uneven surfaces in your LVT flooring, it’s essential to ensure the subfloor is properly leveled. Here are two effective methods to achieve a smooth and stable base:
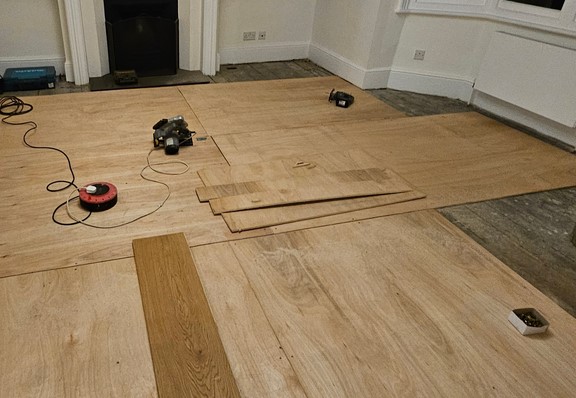
1. Leveling with Plywood
Installing a layer of plywood as an underlayment can significantly improve the flatness of your subfloor. This method is particularly useful when dealing with minor imperfections or slight unevenness in the existing floor. When properly secured, plywood provides a strong and reliable foundation for your LVT flooring.
Key Benefits:
- Creates a stable and uniform surface – Reduces the risk of dips or raised spots.
- Bridges minor subfloor inconsistencies – Helps smooth out small imperfections in wood or concrete subfloors.
- Cost-effective and easy to install – A practical solution that doesn’t require extensive labour or specialised tools.
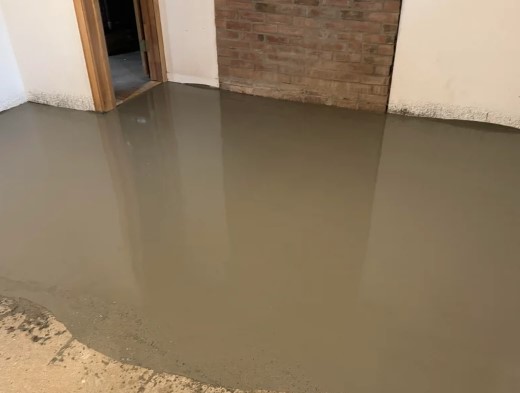
2. Self-Leveling Compound
For subfloors with significant irregularities, applying a self-leveling compound is an excellent solution. This liquid mixture spreads evenly across the floor, filling in low spots and creating a perfectly level surface. Once it dries, it forms a strong, smooth base ideal for click-lock or glue-down LVT flooring.
Key Benefits:
- Effectively corrects major subfloor inconsistencies – Ensures a flat and even foundation.
- Creates a seamless, smooth surface – Prevents dips that could lead to gaps or misalignment.
- Enhances flooring durability and performance – Reduces stress on the LVT planks, extending their lifespan.
- Fast-drying and efficient – Allows for quick installation without prolonged waiting times.
By choosing the right leveling method, you can ensure your LVT flooring is properly supported, preventing future issues and maintaining a high-quality finish for years to come.
Conclusion
The appearance of gaps and cracks in LVT flooring is often a direct result of an uneven subfloor. By investing in proper subfloor preparation—whether by installing a plywood underlayment or using a self-leveling compound—you can prevent these issues and ensure a long-lasting, visually appealing floor. Attention to detail during the installation phase not only enhances the aesthetics of your space but also protects your investment for years to come.
Taking the time to prepare your subfloor correctly is a small step that makes a big difference. Whether you’re a DIY enthusiast or a professional installer, remember that a level subfloor is the cornerstone of a successful LVT flooring project.