Back to Floor Sanding
How to Sand Floorboards Without Causing Damage – A Step-by-Step Guide
 Sanding floorboards is an essential process for restoring or refinishing wooden floors, but it must be done correctly to avoid damage. Proper sanding not only ensures a smooth and even surface but also extends the life of your floors. Whether you’re looking to remove old finishes, eliminate imperfections, or simply give your floor a fresh look, getting the sanding process right is important.
Improper sanding can lead to significant risks such as gouging the wood, creating uneven surfaces, or even exposing the wood to long-term damage like warping or splintering. These issues often arise when too much material is removed, or the wrong equipment is used. Additionally, incorrect sanding techniques can create an undesirable finish that may require costly repairs.
In this article, we’ll provide you with a step-by-step guide to sanding your floorboards the right way, ensuring you achieve a professional-looking result without damaging your wood. From choosing the right tools to mastering the sanding technique, this guide will help you confidently take on your sanding project while preserving the beauty and integrity of your floorboards.
Preparing for Floor Sanding
Proper preparation is very important before you begin sanding your floorboards. Taking the time to inspect and prepare your floors and tools will ensure a smoother, more efficient sanding process and help you avoid mistakes that could damage your floor. Here are the key steps to take before you start:
Inspect the Floorboards
Before you begin sanding, thoroughly inspect your floorboards for any loose nails, cracks, or damaged boards. Loose nails should be hammered in or removed, as they can damage the sanding equipment or cause uneven sanding. Cracks or splits in the wood should be filled with wood filler to prevent them from getting worse during sanding. If you notice any boards that are particularly damaged, it’s best to replace them before proceeding with sanding. This initial inspection will not only ensure the safety of your tools but also guarantee that your floor is prepared for an even sanding process.
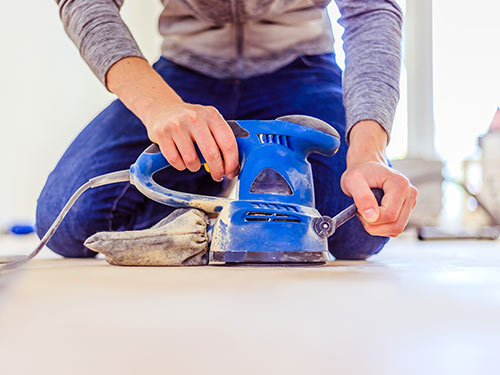
Gather the Right Tools
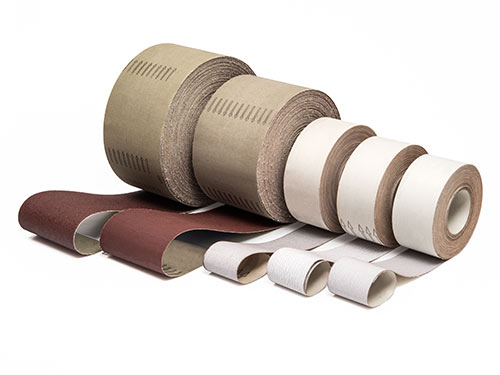
Having the right tools is essential for achieving a smooth and flawless finish. At a minimum, you’ll need a drum sander for large areas, an edge sander for areas that the drum sander can’t reach, and sandpaper in various grits (typically starting with a coarse grit like 36 or 40, and finishing with finer grits like 80 or 120). Additionally, ensure you have a vacuum to clean up dust and debris during the sanding process. Finally, don’t forget safety gear like goggles, dust masks, and ear protection. Sanding creates a lot of dust, so it's crucial to protect yourself from particles that could be harmful to your health.
Clean the Floor Thoroughly
Before sanding, make sure the floor is completely clean. Sweep and vacuum the area to remove any dirt, dust, or debris that could cause scratches or block the sanding process. Pay special attention to any protruding nails or fasteners that could interfere with the sanding machine. These should be either hammered down or removed entirely. Cleaning the floor thoroughly ensures that your sandpaper will work effectively and prevents any unwanted particles from creating a rough finish. The cleaner the floor, the smoother the sanding process will be, resulting in a more professional-looking final product.
Proper Sanding Technique
 Once you’ve prepared the floor and gathered your tools, the next step is to use the proper sanding technique. Sanding correctly is key to achieving a smooth and professional-looking finish without damaging your floorboards. Here’s a breakdown of the key sanding techniques to keep in mind:
Start with the Coarsest Grit
Begin the sanding process with the coarsest grit sandpaper, typically around 36 or 40 grit. This will help remove the old finish, dirt, and imperfections on your floorboards. It's important not to skip this step, as starting with a finer grit will make it difficult to effectively strip the surface. Once the rougher imperfections are removed, gradually move to finer grits (e.g., 60, 80, and 120) to smooth the floor and refine the surface. Each grit level should remove the scratches and marks left by the previous one, leading to a smooth, flawless finish.
Follow the Grain
Always sand in the direction of the wood grain. Sanding against the grain can cause deep scratches that are difficult to remove and will affect the final appearance of the floor. When sanding along the grain, the sanding marks will blend seamlessly into the wood, making the floor look polished and professional. Pay attention to the natural flow of the grain and adjust your movements to ensure the sanding strokes follow its direction.
Keep the Sander Moving
One of the most common mistakes people make when sanding is stopping in one spot. This can result in unsightly gouges and uneven sanding. To avoid this, keep the sander moving continuously across the floor, ensuring that no one area is left in contact with the sanding drum for too long. When using a drum sander, move in overlapping passes, slightly shifting the sander's position each time to create an even surface. Keeping the sander in motion also helps to maintain consistent pressure, ensuring a smooth finish.
Overlap Each Pass
To achieve a uniform result, overlap each pass slightly. This technique ensures that no areas are missed, and it helps to blend the sanding strokes. By overlapping, you create an even sanding pattern across the entire floor. Be sure to make gradual, consistent passes, paying attention to areas where the sander might have missed or left uneven marks. Overlapping each pass also minimises the risk of uneven sanding and gives you better control over the sanding process.
Avoiding Common Sanding Mistakes
While sanding can transform your floorboards, it’s easy to make mistakes that can lead to damage or a subpar result. By being aware of common sanding errors and knowing how to avoid them, you’ll achieve a smoother, more professional finish. Here are some of the most common mistakes to avoid:
- Over-Sanding:
- Can weaken the wood and lead to thinning or low spots.
- Reduces the floor’s lifespan and makes it more prone to damage.
- Solution: Sand gently and check the wood condition after each pass to avoid excessive removal.
- Using the Wrong Grit Progression:
- Skipping grits or jumping too quickly to a finer grit leaves an uneven texture.
- May cause visible scratches or rough patches.
- Solution: Start with a coarse grit, gradually move to finer grits, and ensure each level removes the scratches left by the previous one.
- Not Checking for Nail Heads:
- Protruding nails can damage the sander, leaving dents and marks on the floor.
- This can cause malfunctioning of the sanding equipment.
- Solution: Inspect the floor before sanding to make sure all nails are flush with the surface or removed.
- Skipping Dust Removal:
- Dust buildup can create an uneven surface and affect the quality of the finish.
- Dust can clog sandpaper, making it less effective and leading to an inconsistent result.
- Solution: Vacuum or wipe down the floor between sanding passes, and use a tack cloth to remove fine particles.
Finishing the Floor Properly
 Once you’ve completed the sanding process and your floor is smooth and even, the final step is finishing. A proper finish not only enhances the natural beauty of the wood but also provides protection, ensuring the floor lasts for years to come. Here’s how to finish your floorboards correctly:
Apply a Wood Stain if Desired
If you want to add colour or enhance the natural tones of the wood, apply a wood stain before sealing the floor. Wood floor staining helps to deepen the colour of the wood and can create a more uniform appearance, especially on older floors with uneven colours. Make sure to test the stain on a small, inconspicuous area first to ensure it’s the desired colour. Use a brush or cloth to apply the stain evenly, following the grain of the wood. After applying, allow it to sit for the recommended time, and then wipe off any excess stain to prevent blotches.
Use a Sealant or Floor Finish for Durability
After the stain has dried (if used), the next step is to apply a sealant or floor finish to protect the wood and provide durability. There are different types of finishes available, including polyurethane, oil-based, and water-based finishes. Polyurethane is a popular choice due to its excellent durability and resistance to moisture, while oil-based finishes give a warm, rich look but may take longer to dry. Apply the finish with a brush, roller, or lambswool applicator, ensuring even coverage. Use a light sanding (with very fine grit) between coats for a smoother result, and follow the manufacturer’s recommendations for the number of coats required.
Allow Proper Drying Time Before Moving Furniture Back
Once the finish is applied, it's essential to allow sufficient drying time before placing any furniture or heavy objects back on the floor. Rushed drying can result in smudging, marks, or an imperfect finish. Depending on the type of finish you’ve used, the drying time may vary, but generally, you should wait at least 24 to 48 hours before moving furniture. To avoid damage to the floor while it's drying, keep the area well-ventilated and avoid foot traffic. This drying time ensures the finish has fully set and provides long-lasting protection for your floor.
By taking the time to properly finish your floor, you’ll not only enhance its appearance but also ensure that it stands up to the test of time. A well-applied finish will protect your wood from wear and tear, spills, and other potential damages, leaving you with a beautiful, durable floor to enjoy for years.