Back to Wood Floor Fitting
Floating Installation Made Easy: DIY Engineered Wood Flooring

Whenever you are considering the installation of a new wooden floor, especially when it comes to engineered wood flooring, you will most probably come across the term floating installation and may wonder exactly what that means. This article focuses on helping you understand more about floating installation and whether it is suitable for your project.
What is Floating Installation?
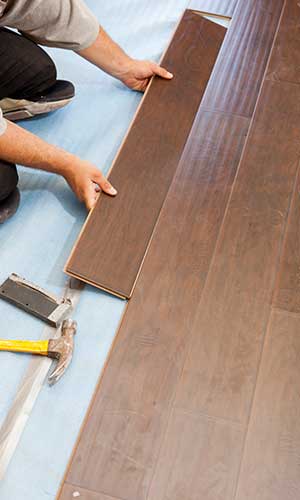
Floating installation is a method of wood flooring installation that does not involve nailing or gluing the planks to the subfloor. Instead, each plank is interlocked with other planks to form a single ‘floating’ floor. This means that the engineered wood flooring isn’t attached to the subfloor directly but instead lies over an underlayment layer. The underlayment provides:
- Cushioning: Provides comfort underfoot.
- Soundproofing: Reduces noise transmission.
- Insulation: Helps maintain temperature.
- Surface Evenness: Creates a flat surface for the planks.
Benefits of Floating Installation
Here are three main reasons why someone would choose the floating installation method for their engineered wood flooring:
- DIY-Friendly: Floating installation is accessible for those who want to undertake the project themselves.
- Minimal Tools Required: You don’t need a lot of specialised tools or equipment to do the job.
- Versatile Application: It can be installed over any existing subfloor or floor covering.
All of the above makes floating installation a great way to achieve a beautiful wooden floor. However, it may not be the best choice in all cases and is best suited for certain projects. Floating engineered wood floor installation might be a good DIY project, but it still requires a specific set of skills and a level of knowledge, so you should prepare yourself thoroughly before starting.
Key Considerations for Floating Engineered Wood Floor Installation
 Before deciding on a floating engineered wood floor installation, here are some crucial specifics to consider:
1. Flatness of the Subfloor
- Minimum Flatness Requirement: The floor must be as flat as possible, with a maximum variation of one inch over ten feet.
- Addressing Imperfections: All dips and humps on the subfloor must be addressed before installation. Failing to do so can result in:
- Poor Stability: The floor may feel bouncy when walked on.
- Hollow Spots: These can develop if the subfloor is uneven.
2. Investing in High-Quality Underlayment
- A high-quality underlayment is essential for:
- Increased Stability: It enhances the overall strength of the floor.
- Soundproofing: Reduces noise transmission.
- Improved Insulation: Helps maintain a comfortable temperature.
- Comfort: Provides a more pleasant feel underfoot.
3. Choosing the Right Engineered Wood Flooring
- Quality Matters: Invest in high-quality wood with excellent milling. Thicker floorboards are recommended for better durability and performance.
- Avoid Thin Boards: Opting for thinner boards can compromise the stability and longevity of your floating floor.
4. Transition Mouldings and Drop-in Vents
- Necessary Components:
- Overlap Transition Mouldings: These allow for expansion and contraction of the floor without damaging the planks.
- Drop-in Vents: Compatible with any type of flooring, they facilitate air circulation.
- Aesthetic Acceptance: If you dislike the look of these features, you may want to reconsider floating engineered wood flooring. However, if you can accept their presence, they are essential for a successful installation.
5. Acclimation of Flooring
- Importance of Acclimation: Before installation, allow the engineered wood flooring to acclimate to the room’s temperature and humidity. This helps prevent warping and ensures a better fit.
- Recommended Acclimation Time: Generally, a period of 48-72 hours is advisable.
6. Expansion Gaps
- Leave Expansion Gaps: It’s important to leave expansion gaps around the perimeter of the room to accommodate the natural expansion and contraction of the wood.
- Gap Requirements: Typically, a gap of about 1/4 inch is recommended along walls and around fixed objects.